

Rancher Kubernetes Engine (RKE) ile Kubernetes Kurulumu
Rancher Kubernetes Engine (RKE) tamamen Docker üzerinde çalışan ve CNCF sertifikalı bir Kubernetes dağıtımıdır. Rancher Kubernetes Engine’in sadece Docker bağımlılığına sahip olması, hızlıca yönetilebilir bir Kubernetes Cluster’ına sahip olma açısından önemli bir avantaj sağlamakta. Bu yazımızda Rancher Kubernetes Engine yardımıyla bir Kubernetes Cluster’ını nasıl oluşturabileceğinizi bulabilirsiniz.
Ön Gereksinim
Rancher Kubernetes Engine, Kubernetes gerekli olan Cluster bileşenlerini Linux dağıtımlarında docker üzerinde ayağa kaldırmaktadır. Dolayısıyla üzerinde Docker çalışan herhangi bir Linux dağıtımı üzerine kurulabilir. Aşağıdaki adımları takip ederek kurulumu ve çalışması için ön gereksinimleri kurabilirsiniz.
Yerel Kullanıcı
Öncelikle tüm node’larda kullanıcı oluşturulmalıdır. Bunun için aşağıdaki komut her bir Kubernetes Cluster üyesi node’da çalıştırılır;
useradd [KULLANICI_ADI]
passwd [KULLANICI_ADI]
Swap Kullanımı
Küme üyesi Worker Node’larda swap kullanımı kapatılmalıdır. Aşağıdaki komutlar sunucularda swap kullanımı kapatılır;
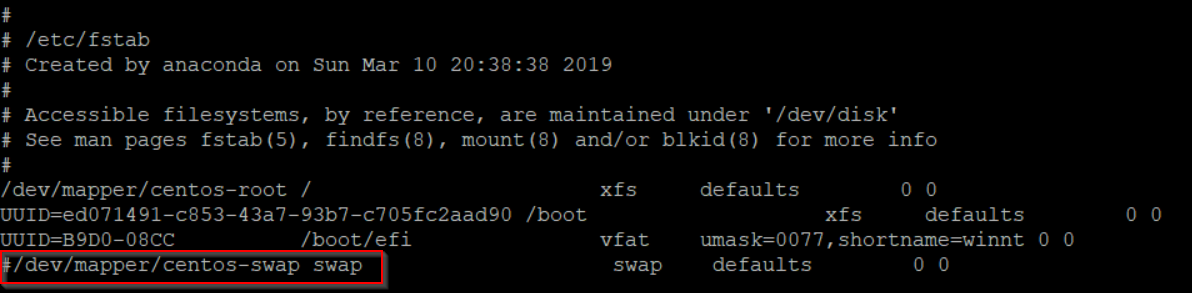
swapoff -a
vi /etc/fstab
açılan ekranda swap satırı # ile comment edilir;
Docker Kurulumu
Rancher tarafından hazırlanan docker kurulum betiği işletim sistemine uygun Docker kurulumunu gerçekleştirecektir. Bu betik aşağıdaki komutla indirilerek çalıştırılabilir;
curl https://releases.rancher.com/install-docker/18.09.sh | sh
Önceki adımlarda oluşturduğumuz kullanıcı Docker üzerinde de işlemler yapacağı için docker kullanıcı grubuna üye olmalıdır.
usermod -aG docker [KULLANICI_ADI]
SSH Yapılandırması
Rancher Kubernetes Engine’in otomatik kurulum yapabilmesi için kurulum yapılacak sunuculara şifresiz ssh erişimi olmalıdır. Aşağıdaki komutu kullanarak öncelikle bir ssh anahtarı oluşturulur. Bu komut kurulumu yönetecek makinede (genellikle yerel makinede) çalıştırılmalıdır.
ssh-keygen -q -f ~/.ssh/id_rsa -N ""
Bu anahtarı kurulum yapılan sunucuların tanıması ve bu anahtarla girişe izin vermeleri gereklidir. Bunun için yine aynı makinede aşağıdaki komutla ssh anahtarı tüm node’lara kopyalanır;
ssh-copy-id [KULLANICI_ADI]@[SUNUCU_IP]
Yukarıdaki komut kurulum yapılacak her bir sunucu bilgileri ile çalıştırılmalıdır. Node 22’den farklı bir port üzerinden ssh hizmeti veriyorsa bu komut aşağıdaki şekilde çalıştırılmalıdır.
ssh-copy-id -p [SSH_PORTU] [KULLANICI_ADI]@[SUNUCU_IP]
Rancher Kubernetes Engine kurulum ve yapılandırma sırasında TCP forwarding kullandığı için kurulum yapılacak cluster node’larında /etc/ssh/sshd_config dosyasında aşağıdaki girdinin olduğuna emin olunmalı;
AllowTcpForwarding yes
Rancher Kubernetes Engine Binary Kurulumu
Yukarıdaki ön hazırlıklar ardından güncel Rancher Kubernetes Engine binary’si https://github.com/rancher/rke/releases adresinden yerele indirilir. Linux bazlı sistemlerde dosya aşağıdaki komutla çalıştırılabilir olarak işaretlenir;
chmod +x rke
İndirilen dosya path’te tanımlı olan bir dizine kopyalanır. Örneğin Linux sistemlerde;
sudo mv rke /usr/local/bin
İşlem aşağıdaki komutla doğrulanır;
rke --version
MacOS Alternatif kurulum
HomeBrew
MacOS sistemlerde yukarıdaki adımlara alternatif olarak aşağıdaki komut kullanılarak homebrew yardımıyla kurulum kolaylıkla gerçekleştirilebilir;
brew install rke
Benzer şekilde, mevcut bir kurulum aşağıdaki komutla güncellenebilir;
brew upgrade rke
MacPorts
MacOs sistemlerde homebrew kurulumuna alternatif olarak MacPorts’da kullanılabilir. MacPorts kurulu sistemde aşağıdaki komut yardımıyla Rancher Kubernetes Engine kurulabilir;
port install rke
Yine homebrew’a benzer şekilde aşağıdaki komutla mevcut bir RKE kurulumu güncellenebilir;
port upgrade rke
Cluster Yapılandırma Dosyası
Rancher Kubernetes Engine cluster yapılandırmalarında küme sunucularının hangileri olduğu ve Kubernetes’in nasıl kurulacağına dair bilgiler için cluster.yml adıyla bir yapılandırma dosyasını kullanır. Aşağıdaki tek node’lu bir kurulum için en basit haliyle örnek cluster.yml dosyası bulunmakta;
nodes:
    - address: [NODE_IP]
      user: [SSH_KULLANICI_ADI]
      role:
        - controlplane
        - etcd
        - worker
Aşağıdaki örnekte ise tüm değerleri verilmiş haliyle örnek cluster.yml dosyası bulunabilir;
nodes:
    - address: 1.1.1.1
      user: ubuntu
      role:
        - controlplane
        - etcd
      ssh_key_path: /home/user/.ssh/id_rsa
      port: 2222
    - address: 2.2.2.2
      user: ubuntu
      role:
        - worker
      ssh_key: |-
        -----BEGIN RSA PRIVATE KEY-----
        -----END RSA PRIVATE KEY-----
    - address: example.com
      user: ubuntu
      role:
        - worker
      hostname_override: node3
      internal_address: 192.168.1.6
      labels:
        app: ingress
# If set to true, RKE will not fail when unsupported Docker version
# are found
ignore_docker_version: false
# Cluster level SSH private key
# Used if no ssh information is set for the node
ssh_key_path: ~/.ssh/test
# Enable use of SSH agent to use SSH private keys with passphrase
# This requires the environment `SSH_AUTH_SOCK` configured pointing
#to your SSH agent which has the private key added
ssh_agent_auth: true
# List of registry credentials
# If you are using a Docker Hub registry, you can omit the `url`
# or set it to `docker.io`
# is_default set to `true` will override the system default
# registry set in the global settings
private_registries:
     - url: registry.com
       user: Username
       password: password
       is_default: true
# Bastion/Jump host configuration
bastion_host:
    address: x.x.x.x
    user: ubuntu
    port: 22
    ssh_key_path: /home/user/.ssh/bastion_rsa
# or
#   ssh_key: |-
#     -----BEGIN RSA PRIVATE KEY-----
#
#     -----END RSA PRIVATE KEY-----
# Set the name of the Kubernetes cluster
cluster_name: mycluster
# The Kubernetes version used. The default versions of Kubernetes
# are tied to specific versions of the system images.
#
# For RKE v0.2.x and below, the map of Kubernetes versions and their system images is
# located here:
# https://github.com/rancher/types/blob/release/v2.2/apis/management.cattle.io/v3/k8s_defaults.go
#
# For RKE v0.3.0 and above, the map of Kubernetes versions and their system images is
# located here:
# https://github.com/rancher/kontainer-driver-metadata/blob/master/rke/k8s_rke_system_images.go
#
# In case the kubernetes_version and kubernetes image in
# system_images are defined, the system_images configuration
# will take precedence over kubernetes_version.
kubernetes_version: v1.10.3-rancher2
# System Images are defaulted to a tag that is mapped to a specific
# Kubernetes Version and not required in a cluster.yml.
# Each individual system image can be specified if you want to use a different tag.
#
# For RKE v0.2.x and below, the map of Kubernetes versions and their system images is
# located here:
# https://github.com/rancher/types/blob/release/v2.2/apis/management.cattle.io/v3/k8s_defaults.go
#
# For RKE v0.3.0 and above, the map of Kubernetes versions and their system images is
# located here:
# https://github.com/rancher/kontainer-driver-metadata/blob/master/rke/k8s_rke_system_images.go
#
system_images:
    kubernetes: rancher/hyperkube:v1.10.3-rancher2
    etcd: rancher/coreos-etcd:v3.1.12
    alpine: rancher/rke-tools:v0.1.9
    nginx_proxy: rancher/rke-tools:v0.1.9
    cert_downloader: rancher/rke-tools:v0.1.9
    kubernetes_services_sidecar: rancher/rke-tools:v0.1.9
    kubedns: rancher/k8s-dns-kube-dns-amd64:1.14.8
    dnsmasq: rancher/k8s-dns-dnsmasq-nanny-amd64:1.14.8
    kubedns_sidecar: rancher/k8s-dns-sidecar-amd64:1.14.8
    kubedns_autoscaler: rancher/cluster-proportional-autoscaler-amd64:1.0.0
    pod_infra_container: rancher/pause-amd64:3.1
services:
    etcd:
      # if external etcd is used
      # path: /etcdcluster
      # external_urls:
      #   - https://etcd-example.com:2379
      # ca_cert: |-
      #   -----BEGIN CERTIFICATE-----
      #   xxxxxxxxxx
      #   -----END CERTIFICATE-----
      # cert: |-
      #   -----BEGIN CERTIFICATE-----
      #   xxxxxxxxxx
      #   -----END CERTIFICATE-----
      # key: |-
      #   -----BEGIN PRIVATE KEY-----
      #   xxxxxxxxxx
      #   -----END PRIVATE KEY-----
    # Note for Rancher v2.0.5 and v2.0.6 users: If you are configuring
    # Cluster Options using a Config File when creating Rancher Launched
    # Kubernetes, the names of services should contain underscores
    # only: `kube_api`.
    kube-api:
      # IP range for any services created on Kubernetes
      # This must match the service_cluster_ip_range in kube-controller
      service_cluster_ip_range: 10.43.0.0/16
      # Expose a different port range for NodePort services
      service_node_port_range: 30000-32767
      pod_security_policy: false
      # Add additional arguments to the kubernetes API server
      # This WILL OVERRIDE any existing defaults
      extra_args:
        # Enable audit log to stdout
        audit-log-path: "-"
        # Increase number of delete workers
        delete-collection-workers: 3
        # Set the level of log output to debug-level
        v: 4
    # Note for Rancher 2 users: If you are configuring Cluster Options
    # using a Config File when creating Rancher Launched Kubernetes,
    # the names of services should contain underscores only:
    # `kube_controller`. This only applies to Rancher v2.0.5 and v2.0.6.
    kube-controller:
      # CIDR pool used to assign IP addresses to pods in the cluster
      cluster_cidr: 10.42.0.0/16
      # IP range for any services created on Kubernetes
      # This must match the service_cluster_ip_range in kube-api
      service_cluster_ip_range: 10.43.0.0/16
    kubelet:
      # Base domain for the cluster
      cluster_domain: cluster.local
      # IP address for the DNS service endpoint
      cluster_dns_server: 10.43.0.10
      # Fail if swap is on
      fail_swap_on: false
      # Set max pods to 250 instead of default 110
      extra_args:
        max-pods: 250
      # Optionally define additional volume binds to a service
      extra_binds:
        - "/usr/libexec/kubernetes/kubelet-plugins:/usr/libexec/kubernetes/kubelet-plugins"
# Currently, only authentication strategy supported is x509.
# You can optionally create additional SANs (hostnames or IPs) to
# add to the API server PKI certificate.
# This is useful if you want to use a load balancer for the
# control plane servers.
authentication:
    strategy: x509
    sans:
      - "10.18.160.10"
      - "my-loadbalancer-1234567890.us-west-2.elb.amazonaws.com"
# Kubernetes Authorization mode
# Use `mode: rbac` to enable RBAC
# Use `mode: none` to disable authorization
authorization:
    mode: rbac
# If you want to set a Kubernetes cloud provider, you specify
# the name and configuration
cloud_provider:
    name: aws
# Add-ons are deployed using kubernetes jobs. RKE will give
# up on trying to get the job status after this timeout in seconds..
addon_job_timeout: 30
# Specify network plugin-in (canal, calico, flannel, weave, or none)
network:
    plugin: canal
# Specify DNS provider (coredns or kube-dns)
dns:
    provider: coredns
# Currently only nginx ingress provider is supported.
# To disable ingress controller, set `provider: none`
# `node_selector` controls ingress placement and is optional
ingress:
    provider: nginx
    node_selector:
      app: ingress

# All add-on manifests MUST specify a namespace
addons: |-
    ---
    apiVersion: v1
    kind: Pod
    metadata:
      name: my-nginx
      namespace: default
    spec:
      containers:
      - name: my-nginx
        image: nginx
        ports:
        - containerPort: 80
addons_include:
    - https://raw.githubusercontent.com/rook/rook/master/cluster/examples/kubernetes/rook-operator.yaml
    - https://raw.githubusercontent.com/rook/rook/master/cluster/examples/kubernetes/rook-cluster.yaml
    - /path/to/manifest
Cluster.yml dosyasında kullanılabilecek tüm değerler için https://rancher.com/docs/rke/latest/en/config-options/ adresindeki dokümantasyon incelenebilir.
Cluster.yml dosyası için alternatif bir yolda rke uygulamasını kullanmaktır. Varsayılan değerlerle boş bir cluster.yml dosyası oluşturmak isterseniz aşağıdaki komutu kullanabilirsiniz;
rke config --empty --name cluster.yml
Daha basit ve yönlendirici olan bu bir diğer yöntemde rke config komutu ile size sorulan sorulara yanıt verilir. Verilen yanıtlar doğrultusunda cluster.yml dosyası otomatik olarak oluşturulur.
rke config --name cluster.yml
Yüksek erişilebilirlik için birden fazla node’a controlplane rolü atayabilirsiniz. Rancher Kubernetes Engine controlplane rolüne sahip tüm node’lara Kubernetes’in master bileşenlerini yerleştirecektir. Kurulumu yapılan kubelet’ler bağlantı adresi olarak 127.0.0.1:6443 olacak şekilde yapılandırılacaklardır. Bu adres node üzerinde kurulan nginx-proxy tarafından karşılanacaktır. nginx-proxy karşıladığı talebi tüm master node’lara dağıtacak şekilde yapılandırılmıştır.
cluster.yml dosyasının hazırlanması ardından bu dosyayla aynı dizinde aşağıdaki komut çalıştırılarak Kubernetes cluster’ı kurularak yapılandırılır;
rke up
İşlemlerin başarıyla tamamlanması ardında kubeconfig bilgileri kube_config_cluster.yml içerisine saklanacaktır.
Aşağıdaki komut yardımıyla oluşturulan Kubernetes Cluster’ına bağlanmak için gerekli yapılandırmayı kube config dosyasına ekleyebilirsiniz;
KUBECONFIG=~/.kube/config:./kube_config_cluster.yml kubectl config view --merge --flatten > ~/.kube/config
Bakım, problem çözümü ve yükseltme işlemleri için aşağıdaki dosyaların saklanması gerekmektedir;
- cluster.yml
- kube_config_cluster.yml
- cluster.rkestate
1 Comment